
|
 Contact UsDrop of Hope BioSand Filters
Grow and Go curriculumDrop of Hope School ProjectAfrican Countries SelectedCARICOM Countries SelectedFood for LifeChild EvangelismKids Discipleship TrainingYouth Trinity SeriesEnglish UCT Curriculum |
home>>grow and go >> drop of hope>> biosand filter wooden mold Drop of Hope - Ohorizons' BioSand Wooden Mold Embedded Microsoft Office presentation, powered by Office.
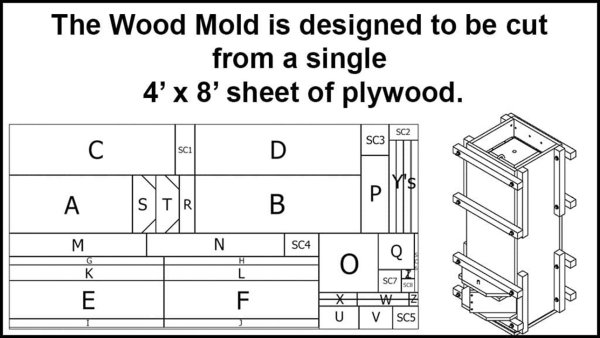
BioSand Filter Wooden Mold
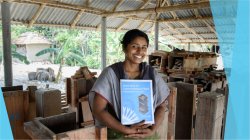
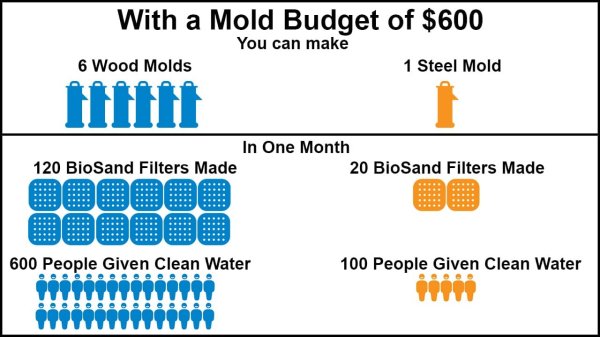
What is the wooden mold used for? The wooden mold is used to make concrete BioSand Filters. The materials needed to build the mold are easily found in local stores even in communities of need. This results in a low project start-up cost and gives the opportunity to have several molds available to manufacture filters at the same time. With more molds, people can produce and get filters much faster.
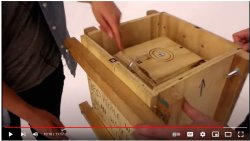
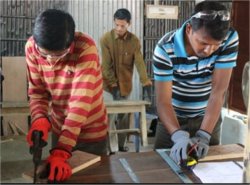
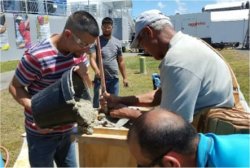
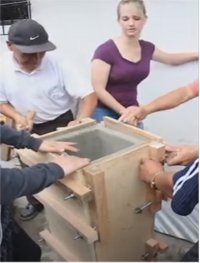
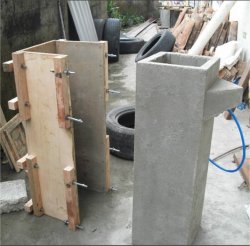
Before You Start Safety First! 1. Keep safety glasses on, especially while using the saw and dry cement. 2. Use masks when dealing with the dry cement and saw dust. 3. No loose clothing (e.g. scarves, draw strings). 4. Everyone should know where the First Aid Kit is located. 5. Everyone knows what number to call in case of emergency. 6. Use gloves when handling concrete and/or cement. 7. Everyone should wear closed toe shoes (tennis shoes or boots, not sandals). BioSand Wooden Mold Step 1: Build and assemble the wooden mold Step 2: Mix and pour the concrete into the mold, let stand overnight Step 3: Unmold the BSF and prepare the filter sand and gravel Step 4: Install filter sand and gravel and run BSF |


STEP BY STEP GUIDE TO USE THE OHORIZON WOODEN MOLD
STEP #2: Install Hardware: Follow Ohorizon's Wood Mold Instruction Manual to combine the pieces of plywood into the different mold parts.
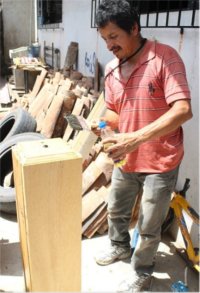
STEP #8: Remove filter from mold: STEP #9: Fill this new filter body with water and allow it to cure for a further 7 days before installing. Where can I find additional Information? The OHorizons Wood Mold Construction Manual contains technical information on creating the Wood Mold, using the Wood Mold, and proper filter installation. For additional assistance on problem solving with the Wood Mold, creating diffusers, sourcing sand and gravel, and more please see the OHorizons Wood Mold Appendix, which can also be found on our website. For more information on educating the user, follow-up procedures, and more please contact OHorizons. We have many additional materials that may be helpful in planning and implementing your project. If we don't have the specific resource you need, we can help you locate additional resources elsewhere.
You can always contact OHorizons via the Contact form on our website (www.ohorizons.org) Or you can email us directly at info@ohorizons.org
Stage F: Make the Diffuser The purpose of the diffuser is to protect the top of the sand from moving around when you pour the water into the filter. This protects the biolayer. The diffuser also makes sure the water drips onto the sand evenly across the top of the sand. This way all of the sand can be used to treat the water. You can build a diffuser out of many materials. Use a material that you can find locally and that someone local has the skills to work with. Example Materials: · Sheet metal (galvanized) · Plastic · Concrete · Acrylic sheet Diffuser boxes work better than diffuser plates. Diffuser boxes have to be made out of galvanized sheet metal. CAWST recommends making diffuser boxes. Design:
Be careful working with sharp edges, especially when using sheet metal. Use gloves. Stage G: Make the Lid The purpose of the lid is to stop anything from getting inside the filter. You can build a lid out of many materials. Use a material that you can find locally and that someone local has the skills to work with. Example Materials: · Sheet metal (galvanized) · Simple wood · Carved wood · Ceramic tiles · Concrete Design: · The lid should cover the entire top of the filter. · It should not be easily knocked off the filter. · It should be easy to take off and put on again. · Some lids have handles, some do not. If there is no handle, people can store items on top of the filter lid. · On wooden lids, the handle should be attached to the lid with at least 2 nails going into the lid at different directions, so that the handle does not pull out when you lift the lid. · Wood lids should be painted with an oil-based paint to stop mould from growing inside the lid. HANDOUT: Download Handout #10 - BioSand Wooden Mold A DROP OF HOPE
GROW AND GO CURRICULUM
SOWING SEEDS OF SUCCESS - MORINGA CURRICULUM
SUPER FRUIT CURRICULUM
NEW LIFE CURRICULUM
|


| Copyright © 2024 www.UnitedCaribbean.com. All rights reserved. Disclaimer Click to Contact us |