|
 Contact UsDrop of Hope BioSand Filters
Drop of Hope School ProjectKids Discipleship TrainingChild EvangelismNuer Grow and Go curriculumAfrican Countries SelectedEnglish/Nuer UCT Curriculum |
home>> drop of hope>> sand and gravel >> sieve>> wash sand and gravel Nuer Drop of Hope - Wash the Filtration Sand and Gravel Embedded Microsoft Office presentation, powered by Office.
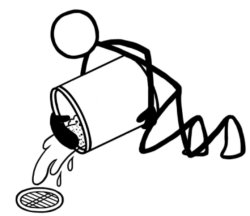
1. Put some sieved separation gravel or drainage gravel in a bucket. 2. Fill the bucket half full with clear water 3. Swirl the gravel around in the water using your hand or a clean stick or spoon. 4. Dump the water out of the bucket. Hold back the gravel with your hand so it does not fall out of the bucket. Pour the water down a drain or into a settling tank. If you use a settling tank, you can reuse the water when the dirt has settled to the bottom. 5. Repeat steps 2, 3 and 4 until the gravel is completely clean and the water you dump out is clear. Wash gravel until it is completely clean 6. Fill out the monitoring form for Sand and Gravel Preparation 7. Store cleaned gravel in a dry, clean place. Or dry it and then put it in bags ready to take for installation. For one filter, you will need a bag with about 3 L of washed drainage gravel (or about 2.7 quarts), and another bag with about 3 1/4 L of separation gravel (or about 3 quarts). |
|
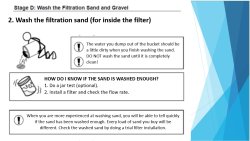
2. Wash the filtration sand (for inside the filter) 1. Put some sieved filtration sand in a bucket. This is sand that has gone through the 0.7 mm (0.03") screen. 2. Fill the bucket half full with clear water. 3. Swirl the sand around in the water using your hand or a clean stick or spoon. 4. Dump the water out of the bucket. Hold back the sand with your hand so it does not fall out of the bucket. Pour the water down a drain or into a settling tank. If you use a settling tank, you can reuse the water when the dirt has settled to the bottom. 5. Repeat steps 2, 3 and 4 a few times. Count how many times you wash the sand. The water you dump out of the bucket should still be a little dirty when you finish washing the sand. DO NOT wash the sand until it is completely clean! HOW DO I KNOW IF THE SAND IS WASHED ENOUGH? 1. Do a jar test (optional). 2. Install a filter and check the flow rate. When you are more experienced at washing sand, you will be able to tell quickly if the sand has been washed enough. But every load of sand you buy will be different. Always check the washed sand by doing a trial filter installation once for every truck load of sand you get.
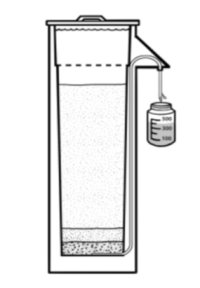
If you can not see the top of the sand, it is too dirty. Keep washing the sand. Do another jar test after 1 or 2 more washes. If you can see the top of the sand but not clearly, it is good. Wash the rest of the sand the same number of times. If the water is clear or almost clear and you can see the top of the sand very easily, the sand is too clean. It has been washed too much. Throw the sand away. Start again, and wash the new sand fewer times before doing a jar test. • Check the sand: Install a test filter and check the flow rate To make sure the sand will work well in the filters, install 1 filter and check the flow rate. 1. Install 1 filter with washed gravel and sand. (This test is usually done at the filter production site). 2. Put a diffuser into the filter. Fill the filter with water. 3. Catch the filtered water in a container with marked measurements on it. 4. You should get 400 mL or less in 1 minute (13.5 US fluid oz). Or, if you are filling a 1 litre bottle, it should take about 2 minutes and 30 seconds (or longer) to fill the bottle. 5. Check the flow rate against the boxes below. Change the number of times you wash the sand if you have to. HANDOUT:Download Handbook #8 Wash the Filtration Sand and Gravel Engish Educational Handout
SOWING SEEDS OF SUCCESS - MORINGA CURRICULUM
|
| Copyright © 2024 www.UnitedCaribbean.com. All rights reserved. Disclaimer Click to Contact us |


